

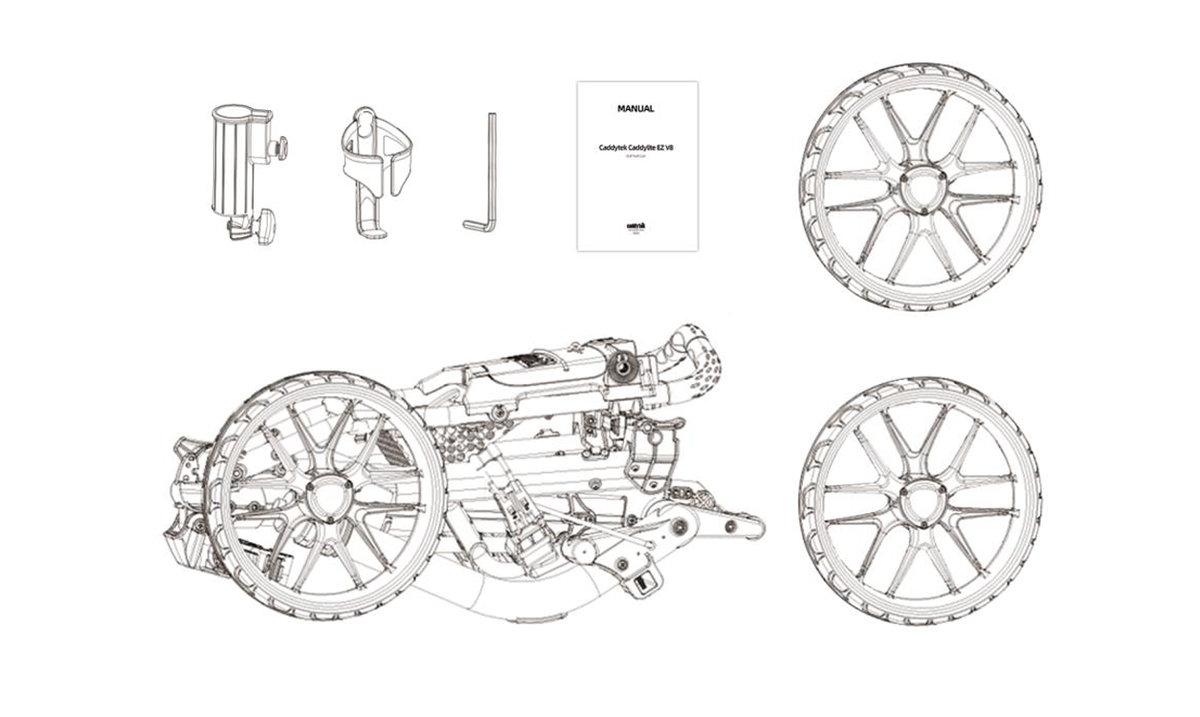
Packing List
- The main frame of the cart with the front wheel.
- 2 Main wheels.
- 1 Umbrella holder.
- 1 Drink holder.
- manual.
- Tools for adjustment.
Start using
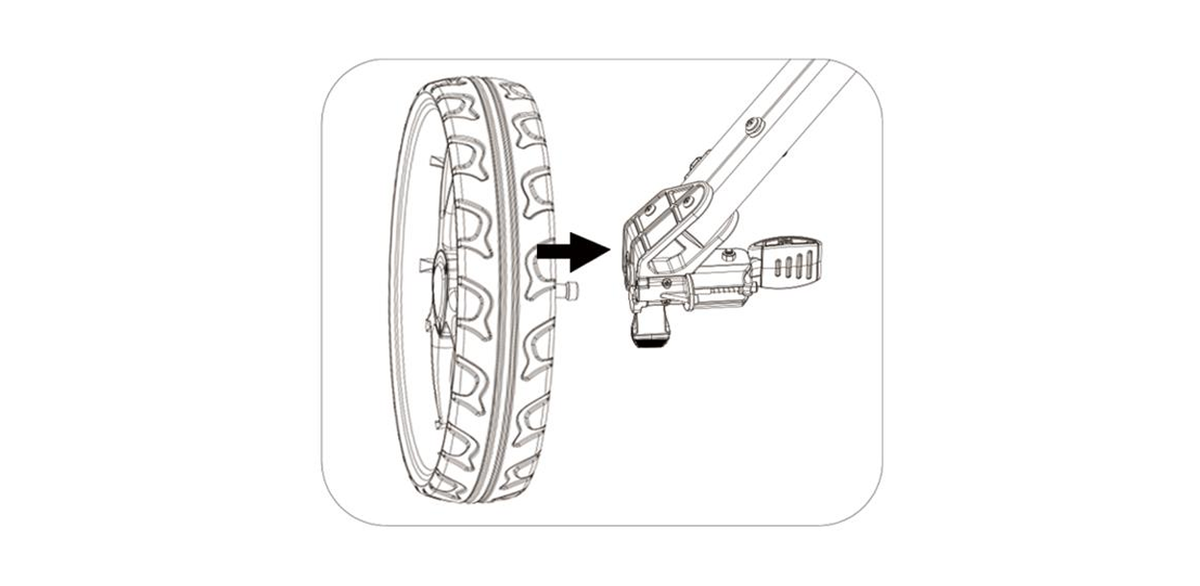
Release wheel lock buckle, fully insert axle into wheel holder, then tighten buckle.
Step 1
Lift the upper golf bag support
bracket upwards.
Step 2
Pull the handle and upper golf bag support bracket to unfold the cart.
(Shake slightly to release the mainframe from the locking slot if needed.)
Step 3
Press the button, rotate the front wheel 180° clockwise, and center it on the cart.
Step 1
Press the button, rotate the front wheel 180° counterclockwise, place it to the right of the fork.
Step 2
Lift the handle upward, then press the folding button, and fold the cart until you hear a click -the folding process is completed.
Step 3
Fold down the upper bag holder bracket.
Step 4
Secure the folded cart with the elastic rope of the lower golf bag bracket.
Accessory Installation
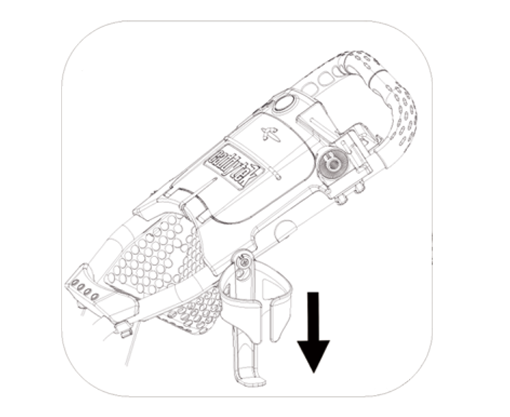
First hang the drink holder on the hook,then pull it downward to tighten.
*Please pay attention to the position of the cup holder when collecting the vehicle to avoid jamming and causing damage.
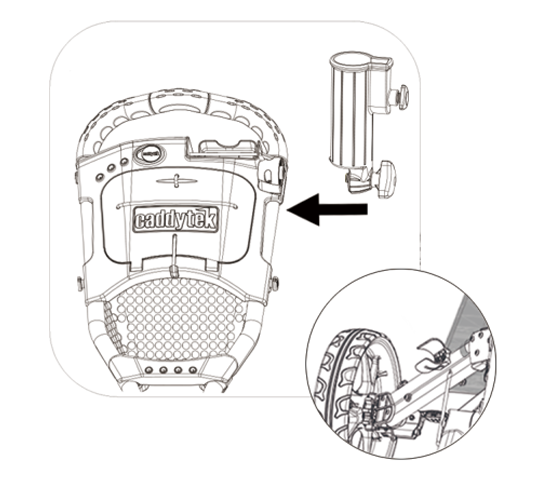
Simply attach the umbrella holder to the cart.
*Please remove the umbrella bucket first before stowing the cart, and place it in the bracket storage position on the vehicle body.
User Guide
Press the foot brake to brake, lift it up to release.
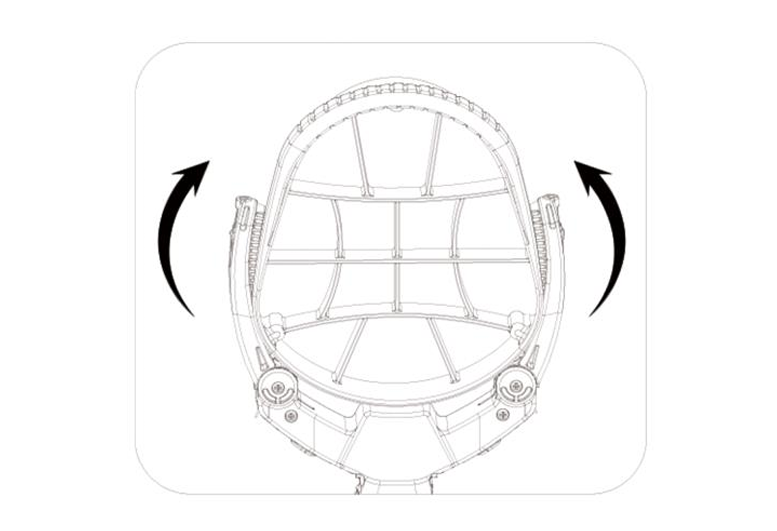
- Push the both wings of upper bracket can be clamp the bag.
- Press the button at the back of upper bracket to lose the wings then take off the bag.
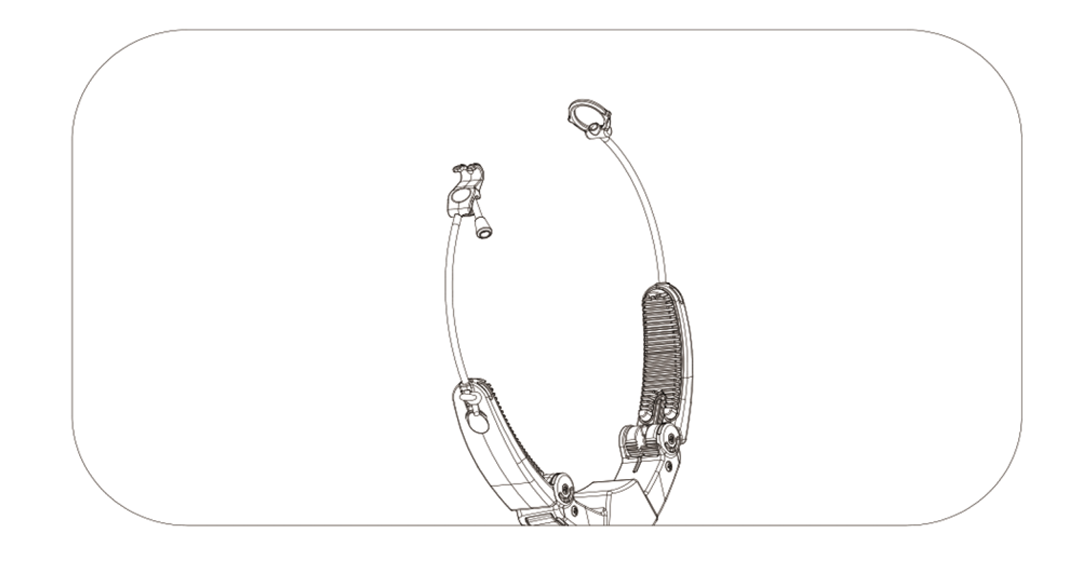
Thread the elastic strap through the hole,adjust it to the proper length, then tie a knot to secure it.
The strap is an optional configuration,included as a free accessory with the vehicle. You may choose to install it or not at your own discretion.
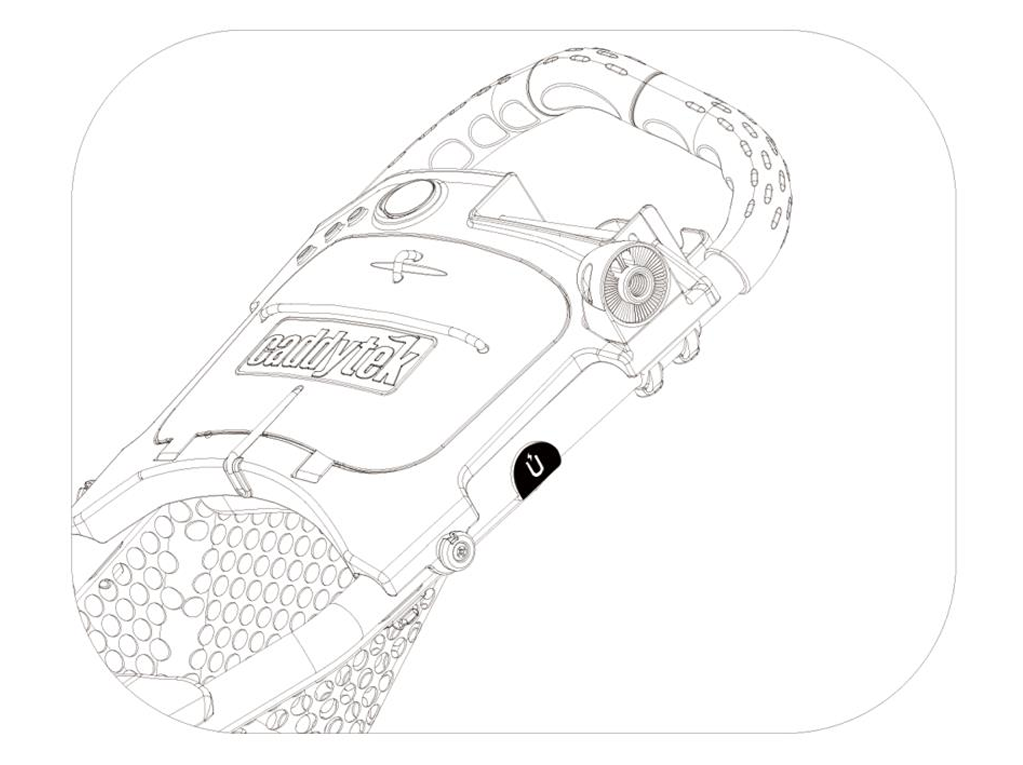
You can attach your device/accessory with a magnet, such as the Manet Towel and Rangefinder to this "Steel Pad".
- Warning:
Please make sure the magnet on your device/accessory is strong enough so it will not fall off.
FAQ & Maintenance
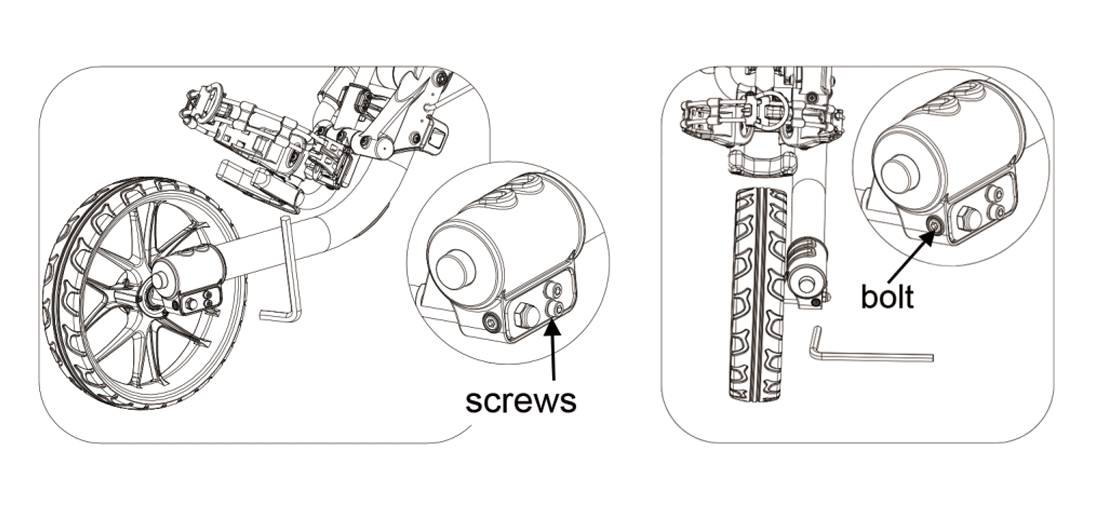
If the cart veers to the right
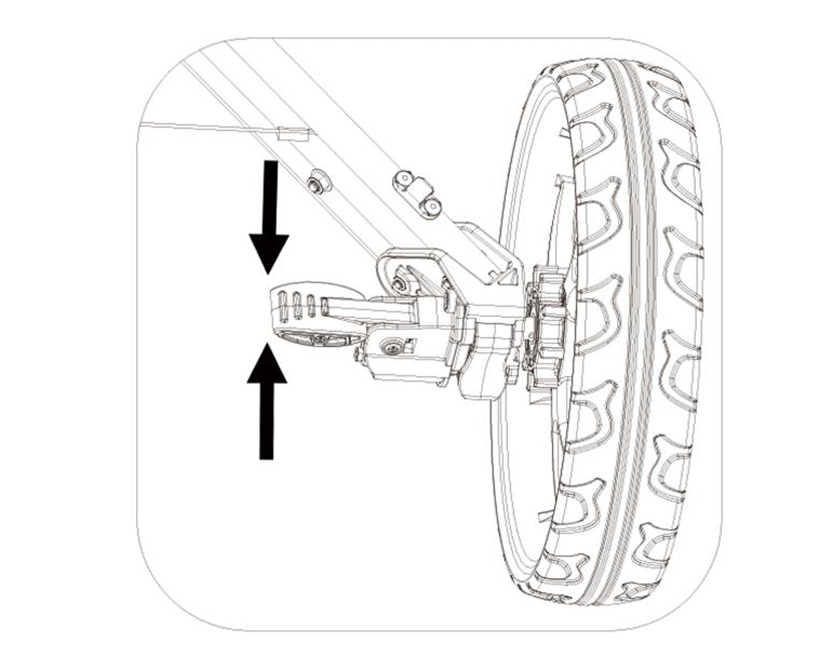
- Face the front wheel of the cart and use the provided Allen wrench to loose the two side.
- Use the provided Allen wrench to turn the front bolt clockwise until the front wheel is perfectly centered,then fully tighten the two side screws.
If the cart veers to the left
- Adjust the front bolt counterclockwise until the front wheel is centered.
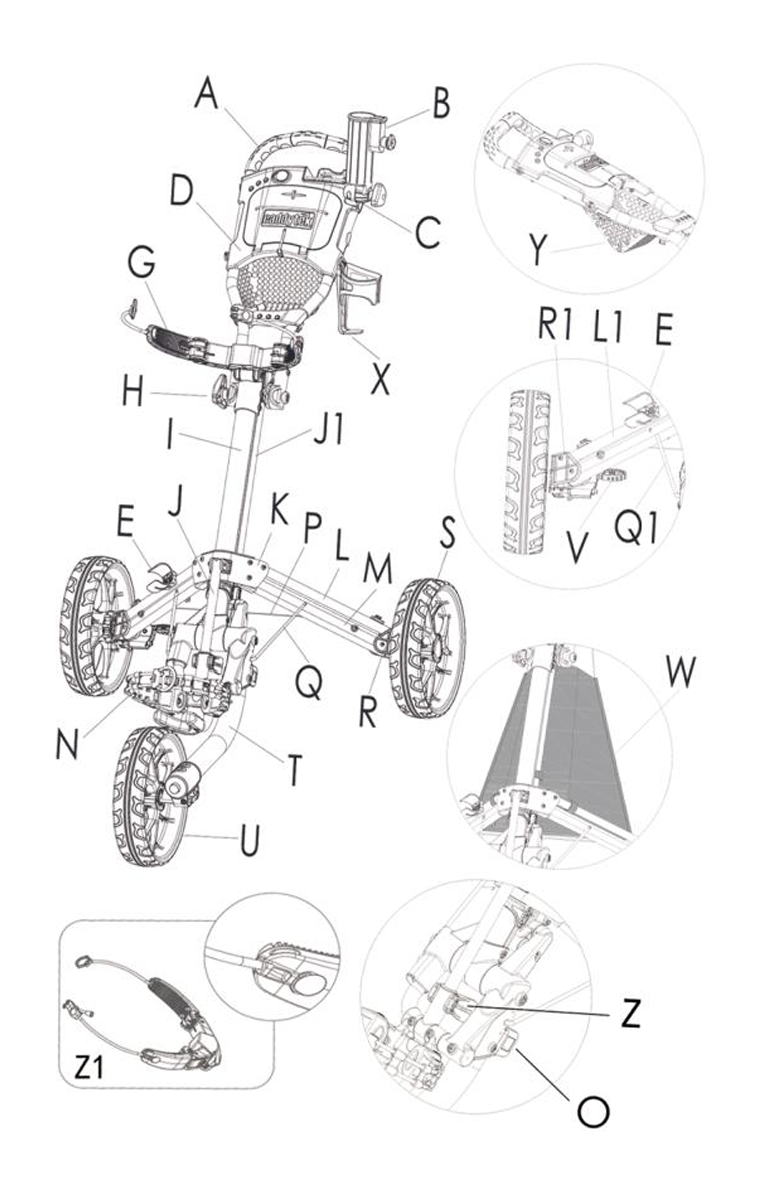
Parts
*Special markings indicate field-replaceable components.
- A TPE handle grip
- B *Umbrella holder
- C *Umbrella holder base
- D Scorecard holder assembly
- E Umbrella holder storage rack
- F Handle frame
- G *Upper bag holder bracket assembly
- H Handle height adjusting knob assembly
- I Main frame
- J Front connection rod
- J1 Main connection rod
- K Leg frame bracket
- L 2 holes right leg frame
- L1 2 holes left legframe
- M 4 holes right leg frame
- N *Lower bag holder bracket assembly
- O Optional seat installation slot
- P Supporting cable
- Q Right stabilization bar
- Q1 Left stabilization bar
- R Right wheel lock mechanism
- R1 Left wheel lock mechanism
- S *Rear wheel assembly
- T Front wheel fork assembly
- U *Front wheel assembly
- V *Foot brake assembly
- W *Basket with cooler
- X *Drink holder
- Y Handle mesh net
- Z Main frame folding holder
- Z1 *Optional upper bag holder strap
Customer Service
- Official Website: www.caddytek.com
- Customer Service Email: service@caddytek.com
- Inquiry Email: sales@caddytek.com
USA
- service-usa@caddytek.com
Canada
- service-canada@caddytek.com
UK&EU
- service-uk@caddytek.com
Australia
- service@incontrosports.com
WARNING
To avoid injury, read all warnings and keep this guide for future reference.
- Read and understand this full guide before using the golf push cart.
- Follow the fold/unfold instructions closely, stay clear of moving parts during adjustment.
- Confirm the cart is fully locked after extension before use, and after folding before lifting/transport.
- Engage the brake when parking.
- No running while using the cart.
- Only use cart-specific accessories.
- Keep hands away from moving and sliding parts.


